
Spring is in the Air
The following blog and recipes appeared on Life’s Simple Ingredient as part of a collaboration with Revive Wellness.

The excitement of spring is finally here! Snow is melting and sprouts of green are starting to appear. For some, it’s the excitement that summer is just around the corner; for others, it is the last push toward the end of school. For farmers, it is the time to start the growing season ahead!
Although you might not see anything growing in the fields yet, the art of farming starts with planning ahead. Farmers have been finalizing seed and crop plans, anticipating planting time, tuning up machinery, ordering supplies and counting down the days to get into the field. Fun fact—these days, farmers may use over a dozen different machines/farming equipment over the entire season.
Spring can also cause changes in routines with more daylight and warmer weather, which can affect our eating patterns. We will also see an increase in the availability of fresh produce, farmers markets opening and the appearance of spring foods such as asparagus, kale, leeks, rhubarb and radishes. We can take a page out of the farming playbook to reflect on our planning abilities when it comes to food. It’s important to reflect on how you are currently planning your meals and how planning ahead can set you up for success. Including some spring-inspired recipes in the mix can help freshen up your routine!
Meal Planning Tips
Meal planning has many benefits from health all the way to cost saving. Here are the top five reasons why meal planning is key to success:
- You have more control over the ingredients that go into your food.
- Meal planning helps prevent last-minute planning for dinner, which can lead to frustration and often results in a quick phone call for food delivery. According to the Government of Canada in 2016, almost 30% of household food spending was at restaurants versus food purchased in stores.
- Cooking and preparing meals at home can help reduce excess sodium, excess unhealthy fat and excess calories. Excess consumption of these can put people at risk for health conditions such as high blood pressure, high cholesterol and weight gain.
- Meal planning can save money! Food costs are increasing, but so is overall food waste—money spent that is going down the drain. According to the Government of Canada, 30% of organic and kitchen waste in Canada is disposed of by households. The most wasted food groups are fruits and vegetables, followed by breads and cereals. Most food waste can be avoided by purchasing smart and planning!
- Yes, you read that right. Mealtimes can be very stressful! If you’re on the go, running from activity to activity or have kids and families, not having a plan can add more stress to your life. Having a plan and the ingredients ready allows the opportunity to have everyone on the same page and map out recipes for days ahead.
If you are new to meal planning, don’t worry. Keep it simple with these tips:
- Start slow. Whether you plan just one meal a day, choose the busiest day of your week to prep a meal in advance, or simply add a new recipe to your routine. These are all great first steps!
- Planning is not one size fits all. It’s important to take a step back and reflect on what you are hoping to achieve and the outcome you are expecting.
- Meal planning involves planning, purchasing and cooking—so be sure to assess what areas in those steps you need to work on before you get started.
- Don’t overcomplicate it! Meal planning does not mean choosing the hardest, longest meal to make—ensure your meal plan matches your lifestyle and capabilities.
Below you’ll find two spring-inspired recipes to add to your next meal plan!
About Andrea Shackel, Registered Dietitian
Growing up in an agricultural family in rural Manitoba, Andrea had always had an interest in food and an appreciation of where it came from. After being a Registered Dietitian for over 10 years, becoming a Certified Diabetes Educator (CDE), and being a Strategic Centre for Obesity Professional Education (SCOPE) Certified Dietitian, her interest in nutrition and food has continued to evolve and grow.
Andrea has come to realize that being a Registered Dietitian is looking at not just what we eat but the bigger picture. Food is delicious, food can be therapeutic, food is complicated and messy, food is a part of our culture and passed down from each generation, food is enjoyment and social and part of an emotional roller coaster. Learning how to recognize our relationship with food and how complex it can be allows us to understand our ability to unlock our potential to move forward with our health goals.
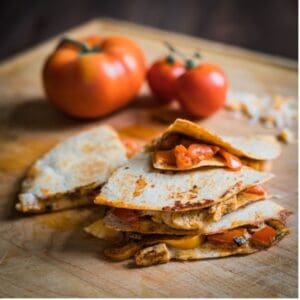
Grilled Chicken Quesadillas
PREP 1HR 15M | COOK 30M | ENJOY IN 1 HR 45M
Makes 6 servings (1 quesadilla per serving)
Ingredients
- 1 lb (454 g) boneless skinless chicken breasts
- 4 tsp vegetable oil, divided
- 1 tsp lime zest
- 1 tbsp fresh lime juice
- 1 clove minced garlic
- 2 tsp chili powder, divided
- ½ tsp smoked paprika
- ¼ tsp salt
- 1 red bell pepper, sliced
- 1 green bell pepper, sliced
- ½ red onion, sliced
- ½ cup diced fresh tomato
- 1 tsp ground cumin
- ½ tsp garlic powder
- 1 ½ cups grated cheddar cheese
- 6 flour tortillas (8 inch)
- 1 lime, cut into wedges
Preparation
- Slice chicken breasts in half horizontally to create four flat fillets.
- In a large Ziploc bag or a bowl, combine 2 tsp oil, lime zest, lime juice, garlic, 1 tsp chili powder, smoked paprika and salt. Add chicken breasts to marinade then seal and squeeze bag to coat the chicken evenly. Refrigerate for at least 1 hour (or up to 8 hours).
- Preheat barbecue to medium heat (about 375⁰F) and oil the grates.
- Place chicken breasts on grill and cook, covered, until chicken is cooked through and grill-marked, about 3-4 minutes per side. Transfer chicken breasts to a plate. Once cool enough to handle, slice chicken into strips. Cover and keep warm.
- Heat 1 tsp oil in a large frypan over medium-high heat. Add peppers and onions and cook, stirring occasionally, until peppers are softened and begin to char, about 8-10 minutes. If pan begins to scorch, add 1-2 tbsp water to pan and adjust heat as needed. Add tomato, cumin, garlic powder and remaining 1 tsp chili powder and cook until fragrant, about 2 minutes. Transfer to a bowl and set aside. Wipe out skillet with a paper towel.
- Heat remaining 1 tsp oil in same pan over medium-low heat. Add 1 tortilla to pan and sprinkle evenly with ¼ cup cheese. Once cheese begins to melt, add chicken and cooked vegetables to one half of tortilla (do not overfill). Using a spatula, carefully fold tortilla over filling to enclose quesadilla.
- Cook until cheese is fully melted and tortilla is lightly browned on both sides, about 2 minutes per side. Adjust heat as necessary if tortillas are browning too quickly.
- Repeat with remaining tortillas, cheese and filling. Note: If there is leftover filling, it can be refrigerated for up to 4 days or frozen for up to 3 months.
- Serve with lime wedges on the side. Enjoy!
Nutritional analysis per serving: 401 calories, 182 fat, 28 g protein, 29 g carbohydrate (26 g available carbohydrate), 3 g fibre, 705 mg sodium

Artichoke Pesto Linguine with Chicken
PREP 10M | COOK 20M | ENJOY IN 30M
Makes 8 servings
Ingredients
- 350 g linguine
- ½ cup jarred artichokes, drained
- ½ medium avocado
- ¼ cup fresh basil, loosely packed
- 3 tbsp pine nuts
- 1 clove garlic
- 1 tbsp lemon juice
- 1 oz grated Parmesan cheese
- ½ tsp salt, divided
- 2 tsp olive oil
- 1 lb (454 g) boneless, skinless chicken breasts, diced
- ¼ tsp ground pepper
Preparation
- Cook linguine in a large pot of boiling salted water. Reserve ¼ cup of cooking water, then drain pasta and return to pot. Cover to keep warm.
- Meanwhile, combine artichokes, avocado, basil, pine nuts, garlic, lemon juice, Parmesan cheese and ¼ tsp salt in a food processor. Blend until smooth. Set aside.
- Heat olive oil in a medium frypan over medium heat until simmering. Season chicken with remaining ¼ tsp salt and pepper. Add chicken to pan and cook, stirring occasionally, until browned and cooked through, about 5 minutes.
- Add cooked chicken and pesto to pot with pasta and stir to combine. Add reserved cooking water to adjust consistency as needed.
- Serve and enjoy!
Nutritional analysis per serving: 302 calories, 8 g fat, 21 g protein, 36 g carbohydrate (33 g available carbohydrate), 3 g fibre, 250 mg sodium